Thursday 30 November 2023

SQL command for CPU utilization in HANA DB

 SQL command for CPU utilization in HANA DB

---------------------------------------------------------------------------------------------------------------------------------------------------------

select top 20 * from M_EXPENSIVE_STATEMENTS where start_time between '2023-11-29 00:48' and '2023-11-29 01:01' order by CPU_TIME desc

--------------------------------------------------------------------------------------------------------------------------------------------------------------

Managing Large tables with partitioning

 when monitoring the system,you can sometimes see tables that have grown so large in SAP HANA that it makes sense to split them "horizontally'' into smaller partitions.By default,you can partition column tables in SAP HANA ,which is ideal for managing high data volumns. The SQL statements - or any data manipulation language(DML) statements - do not need to know that the data is partitioned.Instead,SAP HANA automatically manages the partitions behind the scenes. Thus,SAP HANA simplifies access and frontend development and gives administrators a key tool to manage disks, memory, and large column stores.


In a distributed (scale-out) SAP HANA system, you can also place the partitions on different nodes and thereby increase performance even more because more processors are available for available for your users. in fact, this may become the standard deployment method for extremely large systems with tens of thousands of users.

Currently,SAP HANA suppots up to 2 billion rows in a single column table.in a partitioned schema, you can now have 2 billion rows per partition with virtually no limit on how many partitions you can add.you are limited, not by a database limitation, but by hardware and landscape architecture issues. you can create partitions in SAP HANA in three different ways from an adninistration standpoint: with a range,with a hash and by round-robin method. while more complex schemas are possible with higher- level options. Lets take a look at these fundamental partitioning choices.


Partitioning column tables using a Range

if you know your data really well, you can partition the data by any range in your table.Although the most common is date, you can also partition by material numbers, postal codes, customer numbers, and so on.

Partitioning by date makes sense if you want to increase query speed and keep current data on a single node. Partitioning by customer number makes sense if you are trying to increase the speed of delta merges because multiple nodes can be used at the same time during data loads. you'll have to spend some time thinking of what benefitsyou want to achieve before undertaking any partitioning scheme.Note that the maintenance of range partitions is somewhat higher than the other options because you have to keep adding new partitions as data outside the existing partitions emerge (e.g., next years data if you partition by year now).


partitioning is done using SQL with the syntax seen in listing.
------------------------------------------------------------------------------------------------------------------------
CREATE COLUMN TABLE SALES (sales_order INT ,  customer_number INT , quantity INT , PRIMARY KEY (sales_order))
PARTITION BY RANGE ( sales_order)
(PARTITION 1 <= values < 100000000,
PARTITION 100000000 <= values < 200000000,

PARTITION OTHERS)
--------------------------------------------------------------------------------------------------------------------------


This syntax creates a table with three partitions. The first two have 100 million rows each, and the last partition has all the other records. However, you must follow some basic rules: first, the field you are partitioning on has to be part of the primary key (i.e., sales_order). Second, the field has to be defined as a string, a date, or an integer.Finally, you can only partition column stores, not row stores by ranges.


Partitioning column tables using a Hash:

Unlike partitioning by ranges, partitioning column stores by a hash doesn't require any in-depth knowledge of the data. Instead, partitions are created by an internal algorithm applied to one or more fields in the database by the systemitself. This algorithm is known as a hash. Records are then assigned
to the required partitions based on this internal hash number. The partitions are created in SQL with the following syntax:

--------------------------------------------------------------------------------------------------------------------

CREATE COLUMN TABLE SALES ( sales_order INT , cutomer_number INT , quantity INT , PRIMARY KEY ( sales_order, customer_number)) PARTITION BY HASH (sales_order, customer_number)
PARTITIONS 6

---------------------------------------------------------------------------------------------------------------------

This example creates six partitions by sales orders and customer numbers. some rules apply here as well: if the table has a primary key, the primary key  must be included in the hash. if you add more than one column, and your table has a primary key, all fields used to partition must be part of the primary key also. if you leave off the number 6, the system will determine the optional number of partitions itself based on your configuration. Therefore, using PARTITIONS without a number is the recommended setting for most hash partitions.


Partitioning column Tables using the Round-Robin method:


In a round-robin partition, the system assigns records to partitions on a rotating basis. The round-robin method makes efficient assignments and requires no knowledge of the data. However, removing partitions in the future will be more difficult because both new and old data will be in the same partitions.


The Partitions are created in SQL with the following syntax:

-----------------------------------------------------------------------------------------------------------------------

CREATE COLUMN TABLE SALES (sales_order INT , customer_number INT , quantity INT)
PARTITION BY ROUNDROBIN
PARTITIONS 6


------------------------------------------------------------------------------------------------------------------------

This example creates six partitions and assigns records on a rotating basis. if you change the last statement to PARTITIONS GET_NUM_SERVERS( ), the system will assign the optimal number of partitions based on your system landscape.The only requirement for the round-robin method is that the table cannot contain a primary key.


Sunday 26 November 2023

How To Backup Windows Server 2016

 How To Backup Windows Server 2016


Here we’ll show you how to install the Windows Server Backup feature in Windows Server 2016 with PowerShell and then configure basic server backups.

We’ll also take a quick look at how the backup files are stored and see if they are at all encrypted or not.

In order to perform simple backup and restores out of the box, Windows Server 2016 provides the Windows Server Backup feature. While this does work it is fairly basic and lacks many useful features, if you have many critical servers to backup I highly recommend that you look at something else such as Microsoft’s Data Protection Manager (DPM) or a third party backup solution from some other vendor.

An example of this is that when you backup over the network to an external share with Windows Server Backup you can only store one restore point at a time, any further backups will overwrite existing ones which isn’t very useful if you actually need some sort of retention. The backups are also managed on a per server basis which makes them difficult to maintain and manage.

Install Windows Server Backup Feature

Before we can actually configure the backups, we must first install the Windows Server Backup feature. This can be done through the graphical user interface, however it’s just faster to simply use PowerShell.

First we’ll use the Get-WindowsFeature cmdlet to search for available features that contain the string ‘*Backup*’ in the Name field.

PS C:\> Get-WindowsFeature -Name *Backup*


As we can see Windows-Server-Backup is available for install but not currently installed.

Next we use the Install-WindowsFeature cmdlet to install the Windows-Server-Backup feature, as shown below.

PS C:\> Install-WindowsFeature -Name Windows-Server-Backup


Once complete we should see that the installation has completed successfully, no reboot is required for this feature, we can begin using it straight away.

Configure Backups

Now that we have installed the Windows Server Backup feature, we can begin to configure our server backups. To begin we’re going to open the Windows Server Backup console from the Tools menu in Server Manager as shown below.


From the wbadmin window that opens up, select “Local Backup” from the menu on the left. We will see that there is a warning noting that no backup has been configured for this computer, which is currently expected. We can either configure a backup schedule which will perform the backup as we define, or we can perform a once off backup. Here we’ll setup a backup schedule, by clicking “Backup Schedule” on the right.


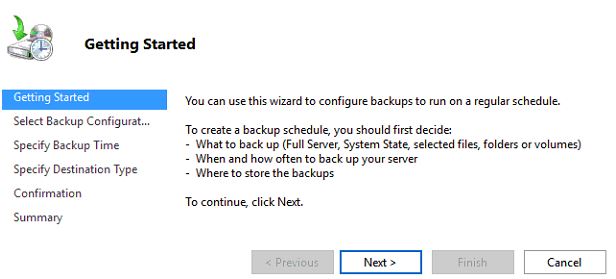
This will open up a Getting Started window advising that we can use this wizard to configure a regular backup schedule for the full server, system state, selected files, folders or entire volumes – click Next to proceed.


On the next Select Backup Configuration window we can select if we want to perform a full server backup which is the recommended and default action, or we can optionally select custom to pick specific volumes or files that we want to backup rather than the full server. In this example we will be configuring a full server backup, however you can change this to suit your requirements.


The next window allows us to specify the time the backup should run. We can set the backup to run once daily at a specified time, or we can optionally have it run multiple times per day by selecting the more than once a day option and adding the times the backup should run to the right side.


Next we will be asked to specify the destination of our backup data. The recommended option is to store the data on a separate disk that is attached to the server, however we can also change this to backup to another volume, or a network share. In this example I’ll be using a network share as I have one available, however note that there is a limitation of this, we will only be able to store one backup point at a time as new backups will overwrite the existing one. This limitation does not exist when you backup to another disk or volume.

We will now specify the network location, here I pick a file share that is available on the local network and click Next to continue. If you selected a disk or volume destination rather than network, you would instead be asked to pick that disk or volume here.


Finally we are presented with a confirmation screen which will summarize our options, click the Finish button to complete the process and accept this, or otherwise go back and make any changes as needed. The summary notes that as we are performing a full backup, we will be able to perform bare metal recovery of the entire system which is fairly powerful.


That’s it, the backup should automatically start at the time specified. We can manually initiate it by going back to the Windows Server Backup window and selecting “Backup Once”. From here we are given the option to create a once off backup based off of our scheduled backup, so all of the same settings will be used but we will be running the backup now rather than at the scheduled time.

Are Windows Server Backups Encrypted?

This is a common question that I’ve seen asked a few times, so I thought I’d take the opportunity to answer it here. No, by default backups in Windows Server 2016 (and previous versions for that matter) are not encrypted. We can confirm this by simply browsing to the location that we have specified to backup the data to and look through it. Primarily a .vhdx file is created for the C:\ drive of the server, which we can easily mount through disk manager, assign a drive letter to and then browse through the files and folders.

To encrypt the backup files we could setup Bitlocker on the disks where the backups are being stored, however note that this only protects the data at rest. If the data can be accessed while the drive is available for the backup to work, it could also be read by any potential attacker during this time.

Summary

We have shown you how to install the Windows Server Backup feature in Windows Server 2016 using PowerShell, and then configure a basic backup schedule to a network share.

We also then confirmed that the backup files are not encrypted, so additional steps should be taken to protect them.


Saturday 25 November 2023

Difference between Disk Cleanup and Disk Defragmenter

 Difference between Disk Cleanup and Disk Defragmenter


Disk Cleanup helps users remove unnecessary files on the computer that may be taking up space on the hard drive. Disk Defragmenter is a utility offered in Microsoft Windows that rearranges files on a disk to occupy continuous storage space.

The longer a computer is in use, the slower its gets. This is due to the fact that the computer saves files in a manner that different from how we save it. Files are saved in a fragmented form over a number of places, so when a person opens the files the hard drive has to search from a variety of places to find the actual file. Now, even if programs are removed to make up space for other programs, they do not cleanup very well after themselves, leaving bits and pieces of files in various places. As time goes by all and the files start blocking the system, the hard drive and RAM slows down. In order to cope with such problems, Microsoft released two programs: Disk Cleanup and Disk Defragmenter.


Disk Cleanup helps users remove unnecessary files on the computer that may be taking up space on the hard drive. Microsoft Windows started offering this computer maintenance utility for removing such files and helping the computer run faster. Disk Cleanup analyzes the hard drive for unnecessary files that are no longer being used and then removes those files. During its analysis disk Cleanup targets different files such as compression of old files, temporary internet files, temporary windows files, downloaded program files, recycle bin, removal of unused applications or optional windows components, setup log files and off-line files. Aside from removing files, disk cleanup can also provide the option of compressing old files that have not been opened over a period. The compression allows for more space to become freed up. However, if the user wishes to access a compressed file, the access time will be increased depending on the system. In addition to the given categories, the system features a More Options tab that offers additional options for freeing up hardware drive space by removing Windows components, installed programs, etc.

Disk Cleanup can be accessed by click on the Start button and search box putting Disk Cleanup, then picking the option from a list of results. It will then provide a list of hard drives, from which the user can pick the hard drive he wants to clean. In the Disk Cleanup dialog box, on the Disk Cleanup tab, the user can check boxes of files that he wishes to clean up and can then start the cleanup process by clicking OK.


Disk Defragmenter is a utility offered in Microsoft Windows that rearranges files on a disk to occupy continuous storage space. Windows website defines ‘disk defragmenter’ as “the process of consolidating fragmented files on your computer's hard disk.” Fragmentation happens on a computer disk over time as the user saves, changes and deletes files from the system. The changes and alternations to a file are often saved to a different location on the drive. When opening files that are fragmented over a number of locations, the system slows down as the computer has to look into many places to recover the files. The defragmenter helps the system arrange files in a continuous order to save up more room and make it easier for the computer to look for files. It also helps reduce the start up time of the computer.

The IBM PC DOS operating system that was shipped with the IBM Personal Computers in 1982 had included a Disk Volume Organization Optimizer for defragmenting the 5¼-inch floppy disks that were used by the machines. At that time Microsoft’s MS-DOS did not defragment hard disks. The need for defragmenter caused a number of third party companies to start offering their products. While MS-DOS 6.0 introduced Defrag capability, the Windows NT did not offer any similar utility, promoting its customers to use Symantec’s defragmenter. Proper Disk defragmenter utilities were offered as part of Windows 95, Windows 98 and Windows ME. The latest versions of Windows often have a timed defragmenter that runs on a set schedule so that the user does not have to manually defragment the system.

Both of these maintenance utilities are effective tools for reducing system lags and allowing the system to free up more space so that it can run more smoothly. However, remember that these utilities must be run periodically to keep the computer from lagging as these are temporary and more files often start building up in the system

Friday 24 November 2023

Coping backup from source to target screen

Ex: Copy of production backup from production server to quality server using SCP command

login to the prodution server in the putty:

go to /hana/shared/backups/ - where the backup file is located

scp <file_name> <user_name_in the_target_server>@<ip address or hostname of the target server>:/hana/shared/backups


Hit enter

Friday 17 November 2023

TRUNCATE TABLE A;

 TRUNCATE TABLE A;

Syntax for creating new column store table

Ex1:


 Create column Table Test_ColumnTB1 (

   Cust_ID INTEGER,
   Cust_NAME VARCHAR(10),
   PRIMARY KEY (Cust_ID)
);


ex 2

CREATE COLUMN Table XJRM63.Testfordatamasking ( "EMP_ID" varchar(10), "Emp_name" varchar (20), "Emp_salary" nvarchar (11)) ;

Create ROW TABLE:

 CREATE ROW TABLE A (A INT PRIMARY KEY, B INT);

Monitoring memory Usage of table

 Memory is SAP HANA is used for a variety of purposes.

 First, the operating systems and support files are using memory.

second, SAP HANA has its own code and stack of program files that alsoconsume memory.

Third,memeory is consumed by the column and row store where data is stored.

Finally, SAP HANA needs memory for its working space where computations occur, temporary results are stored, and shared user memory consumption occurs.

In short, physical memory is the maximum memory available, some of which is used by the operating systems and files.The allocated limit is what is "given" to SAP HANA, and the remaining memory is free space.These allocations are important because you're using preallocated memory pools, and you can't rely on Linux operating system information for memory management.However,you can get this information in many other ways.

In addition to the memory consumption and memory tracking information in the preceding sections, you can also obtain memory information using SQL statements. In the M_SERVICE_MEMORY view, you can  execute a set of predefined SQL statements provided by SAP, including those shown below:


To access these statements, open the SQL console from the context menu of the VIEWS folder in  the SYS schema.


Total Memory Used by All Row Tables:
Select round (sum(USED_FIXED_PART_SIZE +USED_VARIABLE_PART_SIZE)/1024/1024) AS "ROW Tables MB" FROM M_RS_TABLES;


Total Memory used by All Column Tables:

Select round (sum(MEMORY_SIZE_IN_TOTAL)/1024/1024) AS "Column Tables MB" FROM M_CS_TABLES;

Total Memory Used by all column Tables in a Schema

Select SCHEMA_NAME AS "Schema", round (sum(MEMORY_SIZE_IN_TOTAL) /1024/1024) AS "MB" FROM M_CS_TABLES GROUP BY SCHEMA_NAME ORDER BY "MB" DESC;


For column tables, SAP HANA sometimes unloads infrequently used columns from memory to free up space when the allocated memory threshold is near the used capacity.So, when memory consumption is estimated, it's important to look at all column tables, not just those currently loaded in memory. You can see all column table sizes in a schema by using the SAP provided SQL statement:


Total Memory by column Tables in a schema:

Select TABLE_NAME AS "Table", round (MEMORY_SIZE_IN_TOTAL/1024/1024, 2)as "MB" FROM M_CS_TABLES WHERE SCHEMA_NAME = 'SYSTEM' ORDER BY "MB" DESC;

Select TABLE_NAME AS "Table", round (MEMORY_SIZE_IN_TOTAL/1024/1024, 2)as "MB" FROM M_CS_TABLES WHERE SCHEMA_NAME = 'XJRM63' ORDER BY "MB" DESC;


Thursday 16 November 2023

Exporting and importing table data and definations

 Exporting and importing table data and definations:

Export of table:

you can export and import table data between systems and hosts. 

* for row- based data tables, you can export the data in comma-delimited format(CSV).
* for column - based data tables, you can also choose a binary format.
    Binary formats tend to be smaller in size and also faster, but this option should only be used if you're        moving data tables between SAP HANA systems (eg: from production to a development box).

To export tables, go to the systems list in SAP HANA studio, navigate to the table(s) you want data from and select EXPORT from the right- click context menu for the table.This will take you to an export wizard (see below screenshot).


that will guide you through the process of selecting tables and available formats.
you can also choose to export only the table definations(catalog) or include the data as well (catalog and data).

select where you want to store the file and how many thrreads you want to use for the export. The more threads you select, the faster the export will execute. However, selecting too many threads may impact system performance for others, so keep it small (one to five) unless you do this on a large system, during off times,or on the systems with little usage.The export  wizard will save the file where you specifiied in the format selected.


Import of table: 


To import table(s) into SAP HANA from the file, simply right- click on the catalog in the systems list in the SAP HANA studio.
Select IMPORT from the context menu.
After entering the file path where the file is located, you can select the table you want.you may have to type in the names of the tables if you're using a remote host.The last import steps tell the system the format of the file (CSV or binary) and enter the threads to be used. The table is now automatically imported in to your system and can be seen in the systems.