Showing posts with label SAP. Show all posts

Saturday, 19 July 2025

Life cycle of SAP


Life cycle of SAP
PhasesDescribtion of phase
EvalutionIn the phase, SAP team will sits with product based company and Analysis their business.
Project prepartionIn this phase, Project planning will be done.Goals,scope,timeline,budget & establishing the project team.
Business blue printBusiness processes mapping to corresponding SAP processes.
Realizationin this phase, actual configuration and customization of the system. only Development server will be designed here.
TestingWhat ever the development they did in above, tests will be done.
Final preparationProduction server starts building.
Go-liveFew configurations where are specifically to production server can be done in this phase.
Sustain/supportTo few errors in case of any and to adopt new features.
End of maintainenceSAP dont support for this versions.
EvalutionIn the phase, SAP team will sits with product based company and Analysis their business.

Monday, 30 June 2025

External SAP HANA PSE File and Certificate Management

External SAP HANA PSE File and Certificate Management

Certificates can also be stored and managed within files located in the file system of the SAP HANA instance. 


By default, they’re stored in the following path:

/hana/shared/<SID>/HDB<instance number>/<host name>/sec


you’ll find several files with a .pse extension. For example:

sapsrv.pse

saplogon.pse

sapslcs.pse

sapsys.pse

sap_system_pki_instance.pse

sap_system_pki_internal.pse

sapsrv_internal.*.pse


Each file has an intended purpose,
1.authentication 
2.TLS secure communication.


There are two main ways to configure PSE files:

1. Command-line using SAPGENPSE tool


2. Web-based SAP Web Dispatcher Administration GUI

*using SAP web dispatcher tool, we can manage .pse certificates effectively.


To access the Web Dispatcher Admin GUI, the user must have the role:
sap.hana.xs.wdisp.admin::WebDispatcherAdmin

Access URL example:

http://<SAP_HANA_XS_HOST>:80(<instance #>)/sap/hana/xs/wdisp/admin/

Example:

http://w4-dh-hana19e-corp.root.internal.com:8000/sap/hana/xs/wdisp/admin

Authentication is required with SAP HANA internal user credentials.

the landing page will default to the SAP web dispatcher monitor.on the leftside,MENU -->PSE management-->just under the SSL and trust configuration.

The interface has a Manage PSE dropdown where you select the PSE file to manage.

With a PSE selected, the following actions are available:

Interface Option | Description

Recreate PSE
When selected, the active PSE file will be reset to a default state. All certificates will also be removed from the trust store.

Delete PSE
To delete a PSE from the file system, select the PSE file in the Manage PSE dropdown menu, then select this option.

Create New PSE
Used to create a new PSE. When clicked, a new window will appear, allowing you to define the PSE encryption algorithm, key length, distinguished name, and file name.

Export Own Certificate
When selected, a new window will appear containing the certificate of the selected PSE file.

Create CA Request
When selected, a new window will appear containing the certificate request text. Copy this text to a certificate authority to generate a new certificate response.

Import CA Response
When selected, a new window will appear containing a text entry block in which the certificate response text can be pasted or entered.

Import Certificate
When selected, a new window will appear containing a text entry block in which a trusted certificate’s text can be pasted or entered.


Sunday, 20 April 2025

Enqueue wp

SAP NetWeaver AS ABAP has an independent lock mechanism that's used to synchronize database access and at the same time ensure that two transactions can change the same data in the database in parallel.


As administrator, you therefore have no power over when a lock entry is created or deleted. Nevertheless, it’s extremely important that you understand the SAP lock mechanism because you may have to delete orphaned lock entries. The lock mechanism works closely with the update mechanism.

There are different types of locks:

Write locks (E): This is also known as exclusive lock mode as the lock data can be edited by only one user. Any other requests from work processes to set another write lock or read lock are rejected. A cumulate lock can be applied on the lock data by the same lock owner again.

Read locks (S): This is also known as shared lock mode as several users can have read access to the locked data at the same time. Additional read lock requests are entertained even if they are from different users. However, a write lock is rejected.

Enhanced write locks (X): This is also known as exclusive non-cumulative lock mode. An enhanced write lock can be requested only once even if it is by the same transaction.

Difference between write locks (E) and Enhanced write lock (X) is: write locks can be set and released by the same transaction several times but X type locks can also be set once even by the same transaction.

Optimistic locks (O): These locks are set up when the users display the data in change mode. Several optimistic locks can be setup on the same data. Optimistic locks are read locks (S), and later converted to write lock (E) when the user wants to save the data. If an optimistic lock on a data is changed to write lock (E), all other optimistic locks on that data will be deleted.

Locks that are set by an application program are released by the program itself or they are released by the update program once the database has been changed.

Transaction code SM12 can be used to monitor SAP locks.

:analysis


sm13 is for update wp monitoring.

in which we can retry the updates.

Thursday, 17 April 2025

Import TR in sap


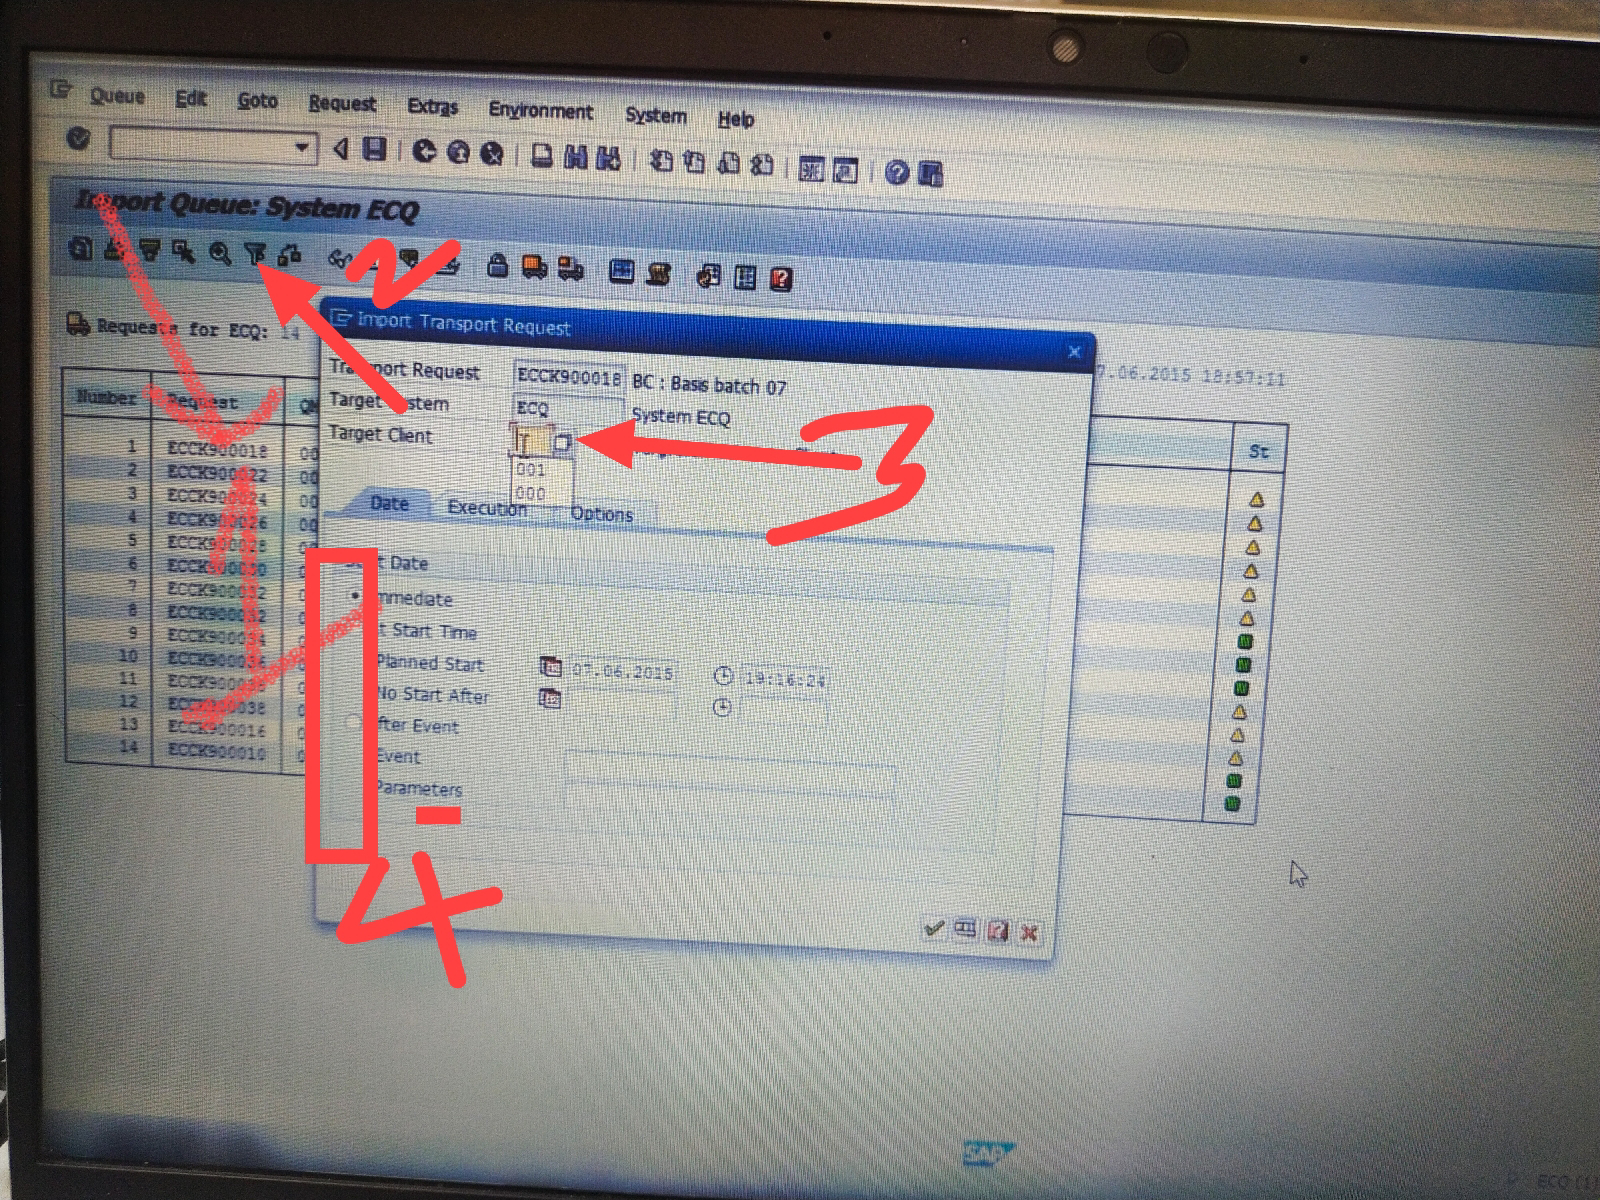
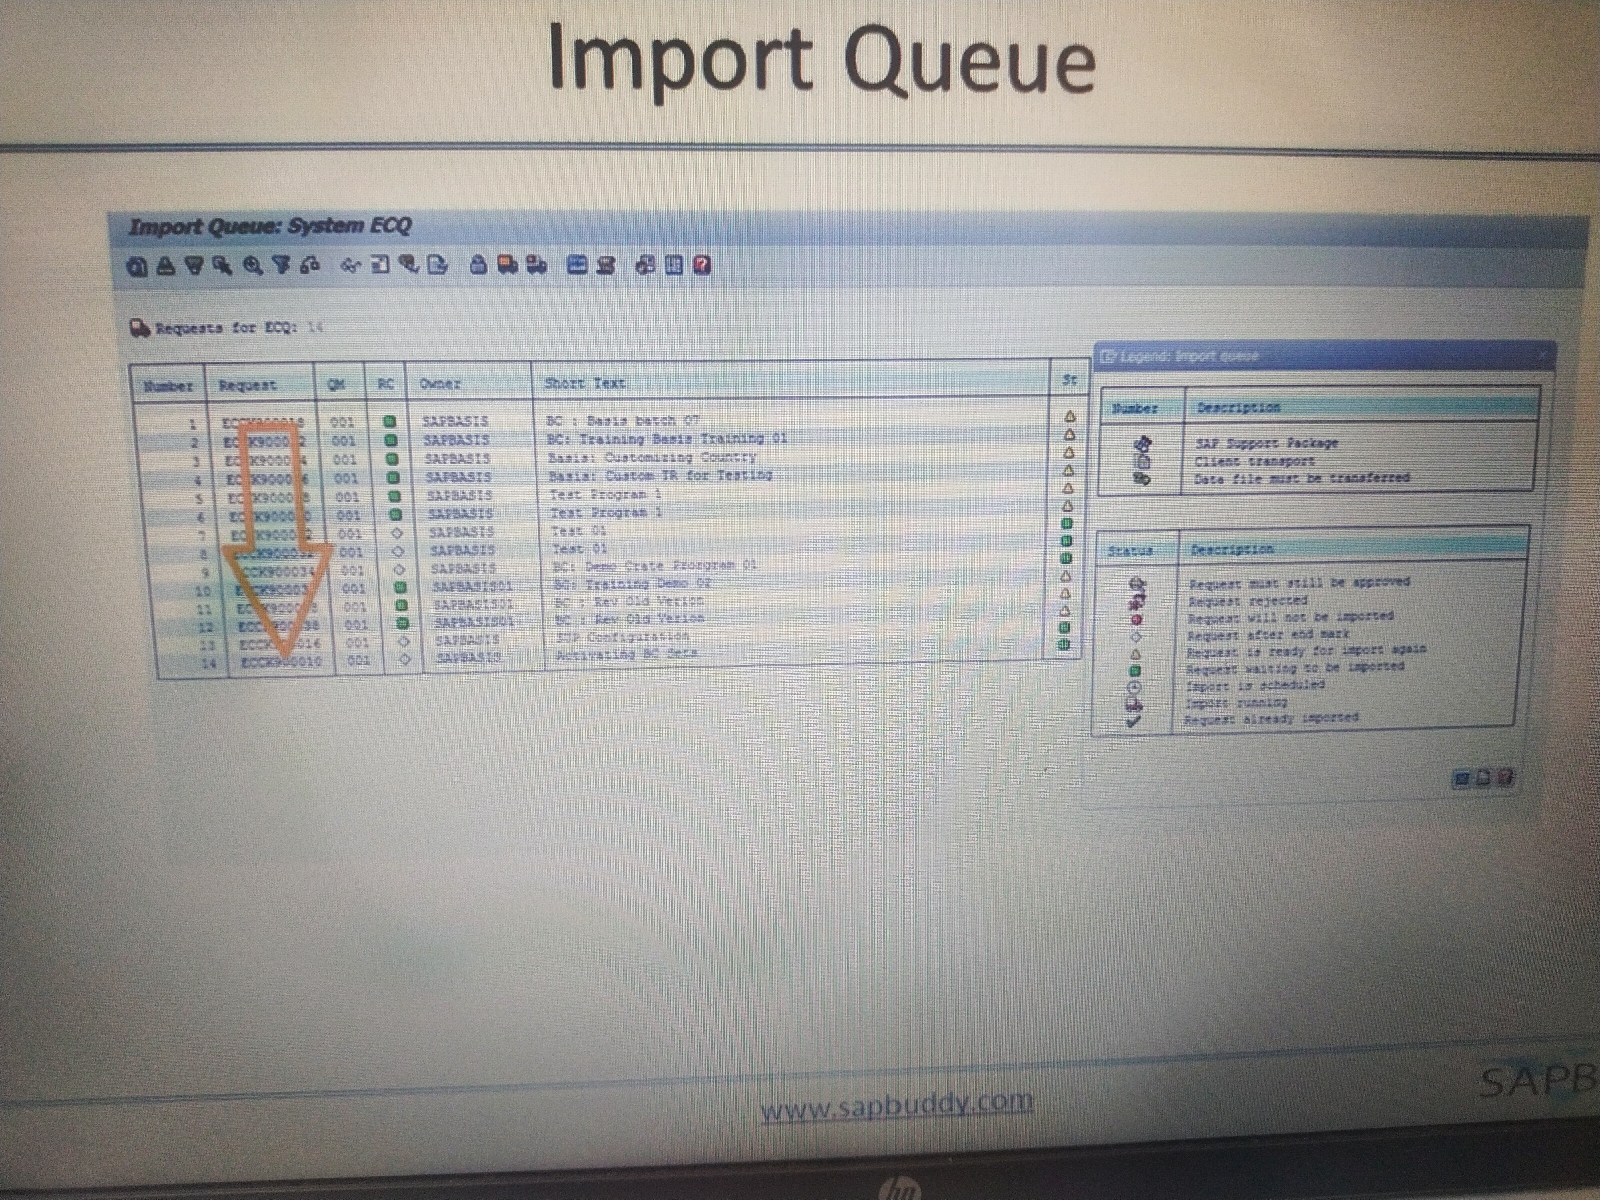
  • In the quality server, Access the T-code: stms_import.


  • 1.Select the Request column.
  • 2.click on filter button.
  • 3. Provide client details.
  • 4.select immediate option. 

* select sync or async in execution tab.                                                                                                           


* Now, select option tab. select the required options.                                                   

Press - yes
Importing status

Import completed


Can move changes in required sequences.